Jan 032013
 

It’s that time of the year again, time for me to post an entry here on my blog because it’s time for Lotusphere again. Well, the conference has been renamed to IBM Connect, so after 12 years I now have to create a new tag for this entry. You can find the session on Vivastream.
This year I’m co-presenting with Wouter Aukema of Trust Factory and I’m really looking forward to it.

ID104: The Best Defense is a Good Offense: Competitive Evaluation of Your IBM Notes/Domino Infrastructure

Abstract:
Many IT managers, IT architects and decision makers find it challenging to define a future social strategy among the onslaught of demands to try something else. This session will arm you with crucial information to defend years of successful investments in the IBM Notes and Domino platform, producing factual data that can be trusted. You will learn how your roadmap becomes stronger when obtaining evidence from your environment that reveals how your business is making use of the IBM Notes and Domino platform so successfully deployed.

Speakers:
Wouter Aukema, Trust Factory B.V.
Viktor Krantz, IBM Software Group
Time:
Tuesday, January 29, 11:15 AM – 12:15 PM
Location:
Dolphin S. Hem IV-V

This session ID104 on Vivastream

Jan 252012
 

Stephan Wissel has already posted about our session at Lotusphere 2012 here. Thank you all for your positive feedback, it’s always fun and interesting to present at Lotusphere and this year was no different.
I wanted to recap a few comments from the evaluations below. You can also see the slides below them.

AD106 – IBM Lotus Domino XPages anywhere – Write them once, See them Everywhere:
97.5% Excellent & Good ratings for quality and content and 90.0% Excellent & Good ratings for quality and effectiveness of speakers

  • Excellent
  • Good info …not *quite* as relevent for us as some of the other sessions, but when either of these gents is presenting, I try to be there …always take away useful knowledge
  • Lot of material and very useful stuff
  • Already moving down this path
  • With XPages, we can now integrate applications with Connections, Portal and for mobile devices
  • Knew what they were talking about and kept it moving for late in the day
  • Well qualified and entertaining. Definitely kept my attention even after a long day of sessions
  • fantastic session and presenters
  • Good session, lots of information
  • Lots of good and useful content
  • Packed house with people standing. Needed a larger room
  • Viktor and Stephen always enjoyable, informative and relevant. Looking forward to Stephen’s promised blog postings!
  • well done
Dec 122011
 

Lotusphere 2012 - Business Made SocialIt’s that time of the year again! Lotusphere time.
For the 11th year in a row I’ve been gracefully selected to speak at Lotusphere.

AD106 IBM Lotus Domino XPages anywhere – Write them once, See them Everywhere

Abstract:
If you need to feature Domino XPages applications in more than just a browser – for example in the IBM Lotus Notes client and sidebar, desktop gadgets, mashups, IBM WebSphere Portal, and IBM Connections – then come to this session! You will learn how to write XPages applications once and show them everywhere.
Speakers:
Stephan Wissel, IBM Singapore Pte Ltd,
Viktor Krantz, IBM
Time:
Monday, January 16, 05:00 PM – 06:00PM UPDATED DATE
Location:
SW Mockingbird 1 & 2

Lotusphere –  Business. Made Social.
January 15-19, 2012 – Orlando, Florida

The premier event for the Lotus community worldwide – developers, administrators , IT and business professionals looking for collaborative software and solutions. From presentations on the latest innovations to hands-on training to interactive networking discussions, it’s all about getting the latest word on Lotus products and strategy that you can’t get anywhere else!

Jan 232009
 

This years version of our Lotusphere session: “The Great Code Giveaway”: The Art of the Possible, is now available for download at download.snapps.com.

Prerequisite:

This application needs to run on a Domino server version 7.0.2 or above. Some Widgets may need version 8.5 or above to run.

This application uses The Dojo Toolkit JavaScript library.
The following is only needed, but required, if you are installing this application on a version of Domino below 8.5.

  1. Download version 1.1.1 or above of Dojo
  2. Unzip the download
  3. Rename and place this directory on your Domino server in the following path:
    path_to_root_data_directory/domino/html/domjs/dojo-1.1.1

This path is hard coded into the MyDomino form. If you want to change the path you can by modifying the HTML shown below in the MyDomino form:

<script type="text/javascript" src="/domjs/dojo-1.1.1/dojo/dojo.js"></script>

This application was tested on version installed with Domino 8.5 (1.1.1) and downloaded version 1.2.3

The application was tested on:

  • Internet Explorer 7.0.5 on Windows
  • Firefox 3.0.5 for Windows
  • Firefox 3.0.5 for Macintosh

Installation:

  1. Change the ACL to match your current environment
  2. Make a non replica copy of the application on your Domino server
  3. Sign it with an appropriate administrators ID

Usage:

Browse to the application and log in as a valid directory user. It should create a myDomino document automatically for the user.
HAVE FUN!

The code is released under the Apache license. You may obtain a copy of the License at:
www.apache.org/licenses/LICENSE-2.0

Have fun with it.

Nov 192008
 

I have been accepted to speak at Lotusphere again. Lotusphere 2009 will be held at the Walt Disney World Swan and Dolphin Resort in Orlando, Florida January 18-22. This year I have three sessions.

BP204 – Enhancing IBM Lotus Quickr for IBM Lotus Domino with Web 2.0 Integration

Troy Reimer, Viktor Krantz
These speakers were the driving engineering force behind the popular Lotus Quickr Templates that shipped with Quickr 8 and have been continually updated. As well, they have been working with Quickr and its predecessors since 2000, developing applications for the world’s largest Lotus Quickr customers. In this session, we’ll introduce you to some innovations that make Lotus Quickr even more valuable to your teams – integration with external sources, tagging, categories, and more. Learn the techniques and pre-packaged code libraries that make Lotus Quickr development easy and valuable to your organization.

BP215 -“The Great Code Giveaway”: The Art of the Possible

Rob Novak, Viktor Krantz
Once again, we’ve invested hundreds of hours into new examples and applications that will open your eyes to “The Art of the Possible” with Lotus software. In its eighth year at Lotusphere, The Great Code Giveaway provides you with a new perspective and new applications that you can use to enhance your IBM Lotus Domino investment. Come and watch while we unveil this year’s valuable – and free – applications and examples!

SHOW202 – Show ‘n Tell: Developing for Lotus Quickr Domino Services

Troy Reimer, Viktor Krantz
In this session, you’ll learn how to develop custom themes for Lotus Quickr, implement custom forms, and build an application that can actually be used in your organization. We’ve developed a template for you to follow along, learning the intricacies of Lotus Quickr development and the most efficient approaches to programming based on their experience with the platform. Take away new approaches, new methods, and a new appreciation for what you can accomplish with Lotus Quickr.

Jan 302008
 

This is the third posting going more in depth of the code I showed at my Lotusphere session BP212: The Great Code Giveaway: “Beyond Cool”. If you haven’t read the first and second article yet I recommend doing so. You find them by clicking the links. You can download the instructions, code and databases here.

What is a Grid

The Book of Dojo explains it well.

Grids are familiar in the client/server development world. Basically a grid is a kind of mini spreadsheet, commonly used to display details on master-detail forms. From HTML terms, a grid is a “super-table” with its own scrollable viewport.

The domino.view.grid that I showed in my session contains two classes. The domino.view.grid class that extends dojox.grid.Grid and the domino.view.model class that extends the dojox.grid.data.DojoData class. It also uses domino.data.ViewStore for doing the XMLHttpRequest (XHR). I wrote about the domino.data.ViewStore in the previous postings.

Instead of going through 630+ lines of code, I’m going to show how to add it to your pages or forms. First the easy one and we’ll gradually move to more complex examples.
All the examples I’m going to show require you to add a couple of lines of code to your page/form.

In the HTML Head Content you have to add a style sheet, tundraGrid.css, and the dojo.js JavaScript. The tundraGrid.css file contains all the classes needed for the Grid to display properly.

"<style type="text/css">" + @NewLine +
"@import "/dojo102/dojox/grid/_grid/tundraGrid.css";" + @NewLine +
"</style>" + @NewLine +
"<script type="text/javascript" src="/dojo102/dojo/dojo.js" djConfig="parseOnLoad: true, usePlainJson: true"></script>"

In the HTML Body Attributes we add a class of tundra.

"class="tundra""

In the JS Header we add the required JavaScript files for the domino.view.grid and the dojo.parser. This is done the very specific Dojo way. It looks like Java but is really JavaScript. Dojo does this really smart by checking if the external JS file is already loaded and available to the browser. If it is not it gets/loads it.

dojo.require("domino.view.grid");
dojo.require("dojo.parser");

All those have to be added in all my examples here. In some of the examples in the download I have added more CSS classes and more JavaScript. In the very basic example this is all we need.

Now let’s add the HTML code to our page/form.

<div dojoType="domino.view.grid" url="sessiongrid1" style="height:600px;"></div>

As you can see (click on thumbnail for larger view) this is a very basic example that just displays a 600 pixel high grid from a view called “sessiongrid1” in the same database as the page/form. If you would look at the “sessiongrid1” view you would see that these columns are in the same order and widths. If you have specified that a column is not Resizable than you can’t resize it in the Grid either.

In the next example we add an attribute of handleViewDesign=true. That will also read in font families, sizes, colors, style and justification of both column headers and bodies. It will also read in colors for Alternate rows in the view property. You also see in this example that when Display values as icons is selected on the column, it displays in the Grid. Both numbered and shared Resources work.

<div dojoType="domino.view.grid" url="sessiongrid2" handleViewDesign="true" style="height:600px;"></div>

Structure

A really neat feature of Dojo’s Grid is that you can have multi row headers. That gives us a way of displaying more data in less space, especially when we have columns with a lot of text. Again the Book of Dojo explains it for us.

In standard spreadsheet and table terminology, a cell is the basic unit of displayed data. A row is a horizontally aligned contiguous group of cells, and a column is a vertically aligned contiguous group of cells. (Wow, that makes a simple concept sound complex!)

In grid-land, there’s a distinction between rows and subrows. A subrow is what people normally think of as a row – it’s exactly one cell tall. In Grid, a row may be more than one subrow – but it is selectable as a unit.

A View is a group of contiguous logical rows with the same inner and outer “shape”… You specify this in JavaScript with an array of arrays. Each array element is an object literal. The most important property of the object is “name”, which names the column. The column name always appear as the top logical row of the grid, and unlike other rows, it doesn’t scroll up or down.

<div dojoType="domino.view.grid" url="sessiongrid3" structure="myStructure" style="height:600px;"></div>

As you can see we are using a view called “sessiongrid3”. You can find that view in the “Sessions.nsf” database in the download. In that view we have added a column with the SessionAbstract field. This field contains a lot of text and if we displayed it in the same way as the previous examples we would see only two/three documents and we would have to scroll the grid a lot. But as you can see we have added a new attribute to the div, structure="myStructure". That tells the domino.view.grid class NOT to read in the design of the view and creating the structure dynamically, but instead that we are supplying it to the grid. Below you see the code example from the page “Grid 4” inside “Sessions.nsf”.

var myViewDesign = {
cells: [
[
{
name:'Session ID',
field:"SessionID",
width:'68px',
sortAsc:true,
sortDesc:true
},
{
name:'Location',
field:"SessLocs",
width:'113px',
sortAsc:true,
sortDesc:true
},
{
name:'Begin',
field:"BeginTime",
width:"96px",
sortAsc:true,
sortDesc:true
},
{
name:'End',
field:"EndTime",
width:"96px",
sortAsc:true,
sortDesc:true
},
{
name:'Session Abstract',
field:"SessionAbstract",
width:'auto',
rowSpan: 2
}
],
[
{
name:'Title',
field:"TITLE",
colSpan: 2
},
{
name:'Speaker',
field:"Speaker",
sortAsc:true,
sortDesc:true,
formatter: withLineBreaks,
colSpan: 2
}
]
]
};
var myStructure = [ myViewDesign ];

Let’s take a look at this code. First we create an object called myViewDesign and in that object we have a property of cells which is an array containing two arrays. Each array represents it’s own row. The first array contains five column objects and the last array two column objects.

Let’s look at the first column object: Session ID. As you can see we have a few properties to this object. The first two are required. The name property is what we want it to say in the column header. The field property is the Programmatic Name of that column specified in the view column with Domino Designer. Width is the default width of the column when first displayed. sortAsc and sortDesc set to true is if we have selected that the column can be sorted ascending, descending or both.

If you look at the Session Abstract column object, you’ll see that we have a width of auto and that we added a property of rowSpan: 2. This column is going to span over 2 rows but also extend to the width of the grid.

The last two column objects are in their own array. As you can see both have a colSpan property with a value of 2. Just as you can do in a HTML table these two columns will span over two columns each, leaving only the Session Abstract column by itself. It however spans over two rows as mentioned earlier. The last thing we do is to create an array, myStructure (named so as to match the structure attribute on the div HTML tag representing the grid), and set it to our object myViewDesign. You can see the result to the right.

In this posting I have only scratched the surface of what you can do with Grids. If you download the demo databases you will see many more examples including how to open documents by clicking cells or rows. You also see examples of how to use several Grids in conjunction with each other, i.e. click on a user document in the first Grid and display his/hers sessions in the second.

If you read up on Dojo Grids on the Dojo Toolkit website you’ll see that there are many more things we can do with Grids. One is to update document data inline right there in the Grid. This doesn’t work in the domino.view.grid class yet but I’m working on it. We also need an Agent for that to work. This Grid class does not work with categorized views as of yet, but I’m working on that as well. Check back here on my blog for updates.

I hope you enjoyed this demo/tutorial and as always if you have any comments or questions please post them here.

Jan 292008
 

Today we explore two extended form widgets I used in my Lotusphere session BP212: The Great Code Giveaway: “Beyond Cool”. The first article in this series can be found here. You can download the instructions, code and databases here.

domino.form.ComboBox & domino.form.FilteringSelect

These widgets are extended from dijit.form.ComboBox and dijit.form.FilteringSelect to accommodate for the URL syntax that a Domino view requires when doing a view search. They are modern and Ajax based. You can open both by clicking the down arrow but you can also type in the field to narrow down the choices. The important part of these widgets is in the _startSearch function.

if(key != ""){
var sLetters = "abcdefghijklmnopqrstuvwxyz**";
var lastChar = key.substring(key.length-1,key.length);
var sUntilKey = "";
if(isNaN(lastChar)){
var iCharNum = sLetters.indexOf(lastChar);
sUntilKey = key.substring(0,key.length-1) + sLetters.substring(iCharNum+1,iCharNum+2);
}else{
sUntilKey = key.substring(0,key.length-1) + (parseInt(lastChar)+1);
}
query["StartKey"] = key;
query["UntilKey"] = sUntilKey;
}else{
query["StartKey"] = null;
query["UntilKey"] = null;
}

What we do here is creating the URL syntax for a Domino view search that requires the &StartKey= and &UntilKey= arguments to find the document(s) the user is searching for.

From Domino Designer 8 Help:

StartKey=string
Where string is a key to a document in sorted view. The view displays at that document. In cases where there is no match for the StartKey, the next document is returned. So, for example, if the StartKey is “A” and there are no documents that begin with “A”, StartKey returns the first document that begins with “B.”

UntilKey=string
UntilKey is only valid when used with StartKey. It allows you to display the range of view entries beginning with the document specified by StartKey until the document specified by UntilKey. For example, &StartKey=A&UntilKey=B would give you all the entries that start with A. Use the &Count keyword to further limit the number of entries returned within any given range.

How to add to them to your form

Both these widgets are very easy to add to your forms. Both require the domino.data.ViewStore discussed in the previous article so you start by adding that.

<div dojoType="domino.data.ViewStore" jsId="DominoStore" url="../sessions.nsf/sessionlookup"></div>

Here we add a div tag with dojoType of domino.data.ViewStore, we give it a jsId of DominoStore and the url is pointing to a database and view. In this case a database called sessions.nsf parallel to the current database and a view named sessionlookup.

We add a Notes field to our form and make it type Dialog list. In the HTML Attributes of the field we add the following:

"dojoType="domino.form.ComboBox" store="DominoStore" searchAttr="IDTitle" pageSize="10" autoComplete="false""

The store attribute is the same as the jsId attribute of our domino.data.ViewStore above. The pageSize attribute is the number of documents we get/show at a time and the autoComplete attribute is for making the top search value auto complete the field. Try if for yourself by setting it to true.

I left the searchAttr attribute for last because it need some explaining. As you know we are using a store to get the values for the field.

If we open up the view sessionlookup in the database sessions.nsf in Domino Designer we see that the view has two columns. If you look at the Programmatic Name for the first column you’ll see that it is IDTitle. This column is what we want values from so we set the searchAttr to IDTitle. The value saved by a domino.form.ComboBox is the same as what you see.

The difference between a domino.form.ComboBox field and a domino.form.FilteringSelect field is that the latter has an onChange attribute and that the value of the field is always the identifier of the store it is using. What is an identifier you ask? Well, all data stores has a unique identifier. In some cases that is just an incrementing number starting at zero, but in the domino.data.ViewStore I created I used the NoteID. Why not the UNID? Because a document can actually exist several times in the same view.

So in a domino.form.FilteringSelect field representing all speakers I have the following attributes.

"dojoType="domino.form.FilteringSelect" store="SpeakerStore" searchAttr="Name" pageSize="10" autoComplete="false" onChange="setMentor(arguments);""

You can see this field in the “Mentor Selection” form in the “Mentors.nsf” database. It is part of the download. We now need the setMentor function.

function setMentor(arguments){
var identityRequest = {
identity: arguments[0],
onItem: function(item){
var sEmail = SpeakerStore.getValue(item, "Email");
alert(sEmail);
},
onError: function(){
console.error("Fetch failed.");
}
};
SpeakerStore.fetchItemByIdentity(identityRequest);
}

A version of this function can be found in the “index” page inside the “Registration.nsf” database. In this function we first create an object, identityRequest, and set the property identity to the first value in the passed in arguments array by setting identity: arguments[0]. We also have an onItem property. This is the function we call when we have retrieved a value. onError is being called if an error occurs. In the bottom of the function we do the call to the store and pass in our identityRequest object. SpeakerStore.fetchItemByIdentity(identityRequest); In this case we only alert the email address of the user we selected but if you look at the same function in the “index” page mentioned above you’ll see that we call another function to go get the profile from greenhouse.lotus.com for that email.

If you want to dig deeper in all possible attributes that a ComboBox and a FilteringSelect can change see the dijit.form.ComboBox and the dijit.form.FilteringSelect JavaScript files. Remember that in Dojo the name space is done by the periods you see in the names above. So in the folder dijit you find a folder called form where you’ll find the files ComboBox.js and FilteringSelect.js.

I hope this tutorial together with my code examples will clarify these two widgets for you. If not please comment below and I will try to explain further.

Jan 282008
 

At Lotusphere in my session BP212: The Great Code Giveaway: “Beyond Cool” I showed a couple of widgets and a Grid based on the Dojo Toolkit. I’m going to show you how I did those in a couple of articles the next few days. Instead of going through the code line for line I’m just going to highlight some of the changed variables and code. All the code for these examples and demos can be found here.

Extending Dojo code

One of the really powerful things you can do with a large toolkit like Dojo is that you can extend a widget/class instead of having to change the underlying code in the toolkit itself. Instead of having to write all the code for your class you just extend an existing class and change the functions/variables you need to. You can also add your own variables and functions. Extending Dojo code is really easy. You create your own JavaScript file and “require” the existing class/widget.

dojo.provide("my.new.Widget");
dojo.require("dijit.widgetToExtend");
dojo.declare("my.new.Widget", dijit.widgetToExtend, {
variablesToChange: "myNewValue",
functionToChange1: function(arg1){
//New code
},
functionToChange2: function(arg1, arg2){
//New code
}
}

In the example above we have extended a widget class called “dijit.widgetToExtend”. You would copy this JavaScript in a file named Widget.js inside a folder structure of “/my/new/” located parallel to the dijit, dojo and dojox folders. There are other places you can put your code but this is the simplest.

Using dojo.data

What is dojo.data?
Dojo.data is a uniform data access layer that removes the concepts of database drivers and unique data formats. All data is represented as an item or as an attribute of an item. With such a representation, data can be accessed in a standard fashion.

Ultimately, the goal of dojo.data is to provide a flexible set of APIs as interfaces that datastores can be written to conform to. Stores that conform to the standard interfaces should then be able to be used in a wide variety of applications, widgets, and so on interchangeably. In essence, the API hides the specific structure of the data, be it in JSON, XML, CSV, or some other data format, and provides one way to access items and attributes of items consistently.

The great thing about dojo.data stores are that they use a predefined way of getting/setting/updating code in the store. Whoever writes code for widgets that use stores does not have care about where the underlying data is located. It could come from a MySQL database, a XML file on the file system or now a Domino view.

domino.data.ViewStore

I’ve added three variables to this class. You see them below with their default value.

parseTypes: false,
dateFormatLength: "short",
handleAsJSON: true,

parseTypes: Parses all view data into it’s correct format. Numbers become floats, dates become locale dates. Locale dates are dates that show up in the format that the current browser language want to show them.
dateFormatLength: If parseType is true, then show the date in this “length”. Can be long, short, medium or full.
handleAsJSON: Default is that all data from the Domino view is returned with JSON using the “&OutputFormat=JSON”. If you set this to false all data is retrieved using XML instead. JSON was not implemented on the Domino server until version 7.0.2 so if you use a server prior to this you need to set this variable to false.

There are five functions I want to mention briefly.

_filterResponse: Used for parsing view data in JSON format to the required format for a store.
_filterXMLResponse: Used for parsing view data in XML format to the required format for a store.
_returnColumnValue: Helper function to get the value for a specific object. Used from _filterResponse.
_returnEntryValue: Helper function to get the value for a specific XML node. Used from _filterXMLResponse.
_returnDateTime: Helper function to format the Domino date string to a dojo.date.locale.

That’s it for this time. Next time we’ll look at domino.form.ComboBox and domino.form.FilteringSelect that both use the domino.data.ViewStore. Happy coding.

Jan 252008
 
Lotusphere 2008 OGS
Photo by Aidy Spender

Rob, Jerald, Troy and I are back home at the office after a very exciting week at Lotusphere 2008. As always I wish I could have attended more sessions but with 5 sessions this year I just ran out of time.

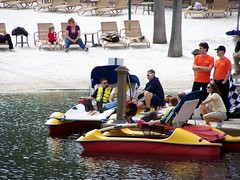
Lotusphere 2008 Boat Race
Photo by Macian

Monday Carl Tyler and I had our heat in the annual Lotusphere Boat Race. Carl could not attend the final on Thursday because of his early flight back home but Troy Reimer from SNAPPS filled in and we finished in 3rd place.

Tuesday morning Troy and I presented BP205 – Extending and Customizing Templates for IBM Lotus Quickr. It was very well attended and even needed a overflow room. The presentation and demo files can be downloaded here.

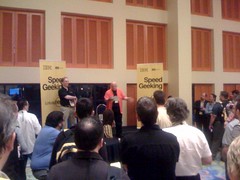
Lotusphere 2008 Speed Geeking
Photo by RLB865

Tuesday night Rob Novak and I presented a cut down version of that session (in 5 minutes) 12 times at the Speed Geeking event.

Wednesday after lunch Troy and I had our very first Hands-On-Lab at Lotusphere: HND305 – Building Custom Themes for IBM Lotus Quickr and it was repeated the same afternoon by Jerald and Troy. A full room in the morning and almost full in the repeat in the afternoon tells me that we need to do this lab next year as well. Session materials can be downloaded here.

Wednesday afternoon Rob and I presented our session: BP212 – The Great Code Giveaway: “Beyond Cool”. This was the third year we presented a “Code Giveaway” session and it was very well attended. We went over 12 demos in 1 hour and it was a lot of fun. Session materials can be downloaded here.

Wednesday night party was a blast at Universal Studios – Islands of Adventure. Jerald, Troy and I made it to a few of the rides.

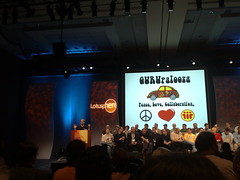
Lotusphere 2008 GuruPalooza
Photo by elesar1

Thursday morning Rob and I repeated our BP212 – The Great Code Giveaway: “Beyond Cool” session at 10 AM. To see the room almost full that early the last day of the conference was very exciting.

Thursday afternoon Rob and I also sat on stage for the annual “GuruPalooza” session.

It was a great Lotusphere and I really hope to be at Lotusphere 2009. I’ll see you there.